![]()
Syncthing is Awesome.
Step 1: Enable root access within ReadyNasOS

Step 2: Download the appropriate SyncThing image here(I downloaded the ARM image because I have the ReadyNas 202). NOTE: You must download the appropriate image or the installation will fail or cause errors later. If you do not know what type of CPU you have, simply click here and find your NAS model.
Step 3 Download PuTTY and enter your IP address and login with a username of root and a specified password
Step 4:Type the followingcd ~
wget https://github.com/syncthing/syncthing/releases/download/v0.11.5/syncthing-linux-arm-v0.11.5.tar.gz
Now, unpack the tar by pasting the following command:tar xzvf syncthing*.tar.gz
Now move into the dircd syncthing*
Now lets call SyncThing like a servicecp syncthing /usr/local/bin
Since we are done with the directory lets remove itcd ~
rm -rf syncthing*
Step 5: Lets start SyncThingsyncthing
Let it run the setup for 2-3 minutes. Once you see a “Node ID,” Press ctrl + c and end the process.
Step 6: Edit the config filenano ~/.config/syncthing/config.xml
Look for the line below and change it to match the below image.

Step 7: Create a file named: “syncthing@.service” with following the contents and copy it to:/etc/systemd/system[Unit]
Description=Syncthing - Open Source Continuous File Synchronization for %I
Documentation=https://github.com/syncthing/syncthing/wiki
After=network.target
[Service]
User=%i
Environment=STNORESTART=yes
ExecStart=/usr/local/bin/syncthing -no-browser -logflags=0
Restart=on-failure
SuccessExitStatus=2 3 4
RestartForceExitStatus=3 4
[Install]
WantedBy=multi-user.target
Step 8: Let’s implement autostart. Paste the following commands separately.systemctl enable syncthing@root.servicesystemctl start syncthing@root.service
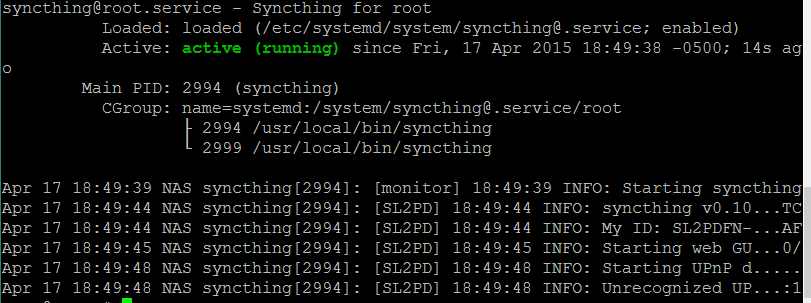
Now check the status by entering:systemctl status syncthing@root.service
It should look like the image below:
Step 9: Go to http://ip:8080 and set up SyncThing.
Step 10: Reboot your NAS and it should start automatically. NOTE: Do not type sudo when running these commands. You will get an error. SyncThing will automatically update to the latest version on first run.